Introduction of MS-Excel.


πŸ‘‰MS-EXCELπŸ‘ˆ

πŸ‘‰What is MS-Excel
                                            Excel is the spreadsheet program that we use to work. When we open Microsoft Excel then a file opens.
This file is named a workbook, this workbook by default contains three worksheets. Each worksheet contains columns and rows. The columns are lettered A to IV; the rows are numbered 1 to 65536. The combination of a column coordinate and a row coordinate makeup.
πŸ‘‰A cell address:-  We enter our data into the cells on the worksheet. In Microsoft Excel, we can enter numbers and mathematical formulae into cells. When entering a mathematical formula, we are required to precede the formula with an equal sign. 
πŸ‘‰ Function:-  Microsoft Excel has a set of prewritten formulae called function.
                            A function is different from regular formulae in that we supply the value but not operators, such as +, -, *, or /.
The Autosum icon on the standard toolbar automatically adds a column of numbers.


 πŸ‘‰ Introduction:-

 As the word is the program used when we want to type anything with text like a letter, a report, memo, etc. Excel is the spreadsheet program that we use to work with figures. Although we can perform simple calculations in word using tables, it is so much easier to use the program which is made for figures, i.e. Excel.

 πŸ‘‰ To understand Microsoft Excel let us start with the Microsoft Excel screen.

If necessary click   ❌ in the upper right corner of the task pane to close the task pane. 
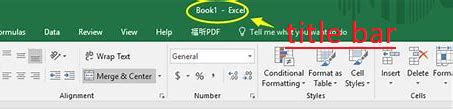
πŸ‘‰ The Title Bar⁏⇨ 


 We will start with the title bar, which is located at the top of the screen. On the Title bar, at the left corner, Microsoft Excel displays the name of the workbook we are currently using. At the top of our screen, we should see "Microsoft Excel-Book" Or any other name.

 πŸ‘‰ The Menu bar:-

 The Menu bar is directly below the Title bar. This bar displays the Menu. Menu word stands for a word, when we click on this word a drop-down list appears. The menu beings with the word file and contains the following: File, Edit, View, Insert, Format, Tools, Data, Window, and Help We use these, menus to given instructions to the software. Points with our mouse to menu options and click the lift mouse button.

 πŸ‘‰ Toolbars:-


 The toolbar is the shortcut to menu commands. The toolbar is generally located just below the Menu bar.

Available the following steps to make these toolbars available on the screen.

1. Point to View on the Menu bar.

2. Click the left mouse button.

3. Click toolbars displayed in the drop-down list.

4. Both Standard and Formatting should have a checkmark next to them. If both have a checkmark next to them, press ESC three times to close the menu or click anywhere on the sheet. If either does not have a checkmark, click Customize.

5. Point to the box or boxes next to the unchecked word or words, Standard and/ or formatting, and click the left mouse button. A checkmark should appear.

 Note:  We turn the checkmark on and off by clicking the left mouse button.

6. Point to close and click the left mouse button to close the dialogue box.

 πŸ‘‰ Worksheets:-

 When we open Microsoft Excel then a file opens. This file is named a workbook, this workbook by default contains three worksheets. Each worksheet contains columns and rows. The columns are lettered A to IV; the rows are numbered 1 to 65536. The combination of a columns coordinate and a row coordinate make up a cell address.

 For example, the cell located in the upper left corner of the worksheet is cell A1, meaning columns A, row 1. Cell E10 is located under column E on row 10. We enter our data into the cells on the worksheet.

            An  Excel worksheet has 256 columns and 65536 rows, hence 256 x 65536= 16777216 cells.

 πŸ‘‰ Selecting Cells:-

 If we wish to perform a function on a group of cells, we must first select those cells by highlighting then

To highlighting cells 

 1. place the cursor in the first cell, 

2. press the F8 key. This anchors the cursor.

3. Note that "EXT" appears on the status bar in the lower right corner of the screen, it means we are in the extended mode. 

4. Click in the cell we want, for example, K2. Cells A1 to K2 should now be highlighted. 

5. Press ESC and click anywhere on the worksheet to clear the highlighting.

so nice day .............                           


Comments

wonderful topic
please, requited ms PowerPoint all details